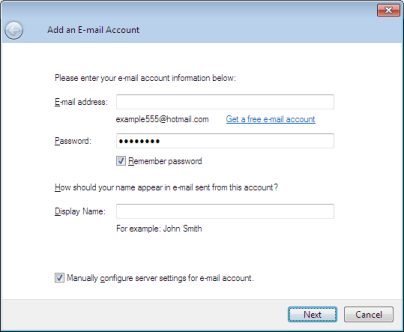
Remember Password: place a check mark in this box if you want Windows Live Mail to save your password
Display Name:
Place a check mark in the Manually configure server settings for e-mail account
Press Next to continue
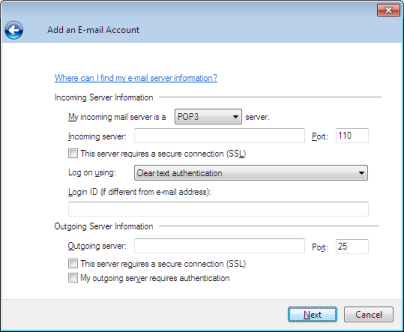
Enter in the following information:
The 'Incoming email server type:' should always be set to POP3 for all Residential or Custom Domain Bell Aliant email accounts, or IMAP for Business IMAP subscribers.
Incoming Server: Use settings on the right, click Business to see business settings
Login ID: Enter in your complete email address
Outgoing Server: Use settings on the right, click Business to see business settings